A Sweating Mannequin?


Return to Portfolio

Screen Shot of Test Program During one of the slow periods with the opera (we call them "lay-offs"), I did a job for a local, and highly specialized, instrumentation company.

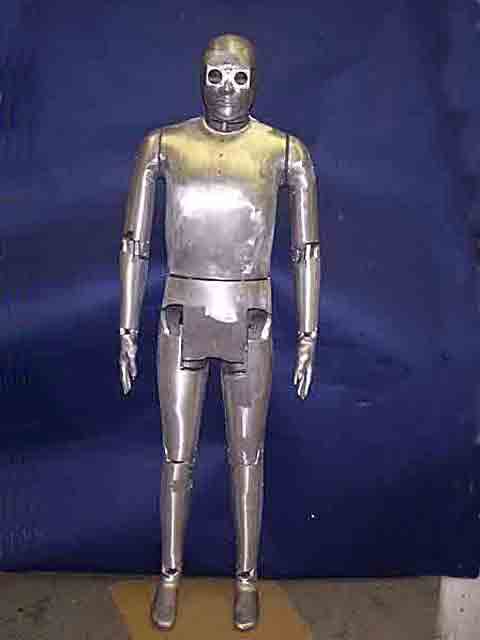
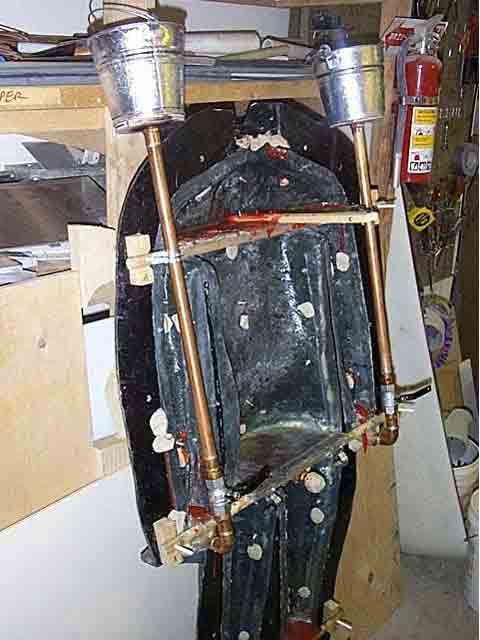
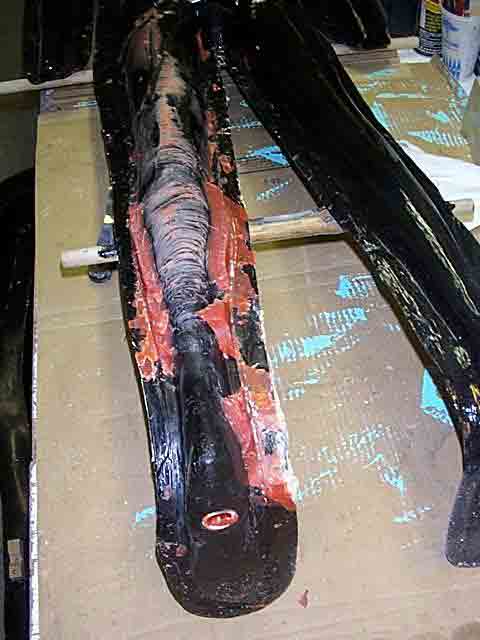
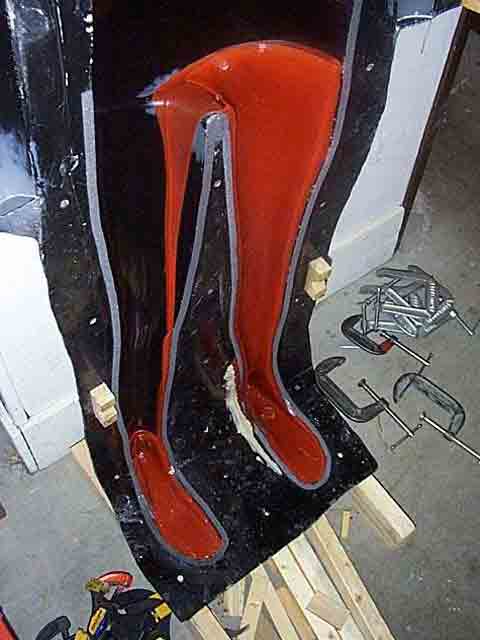
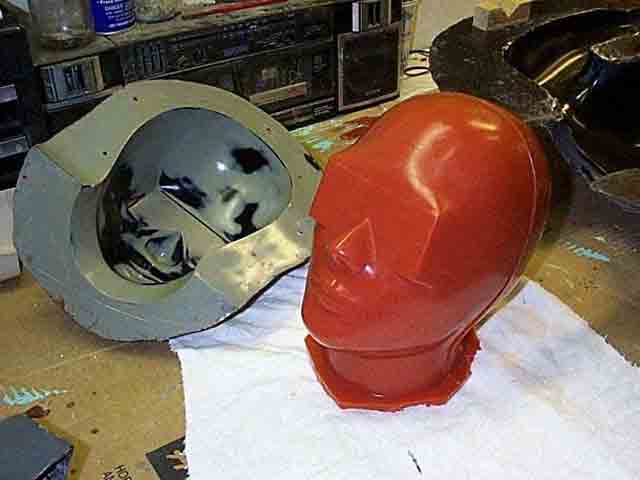
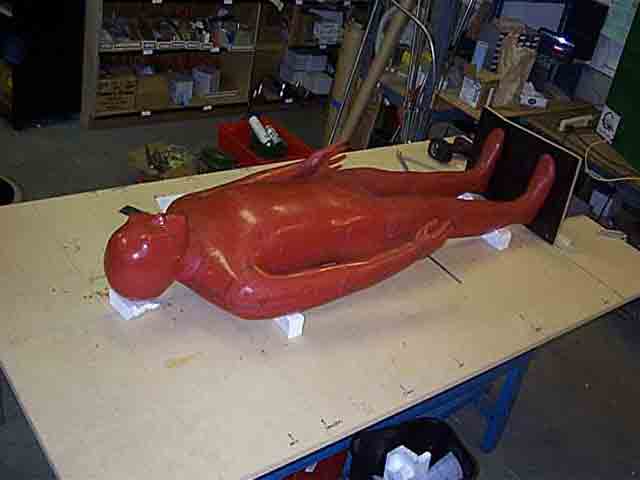
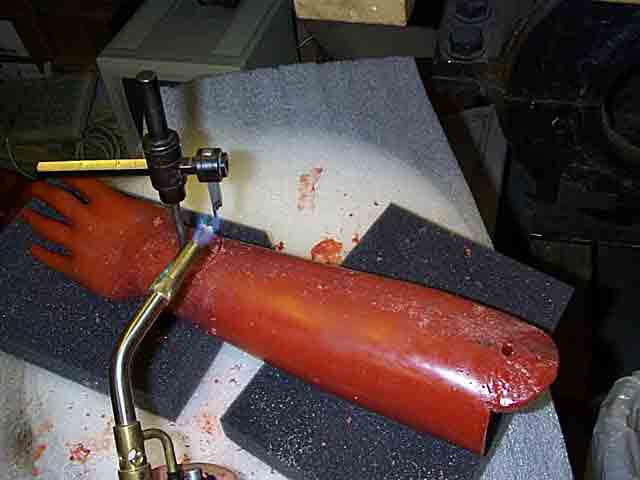
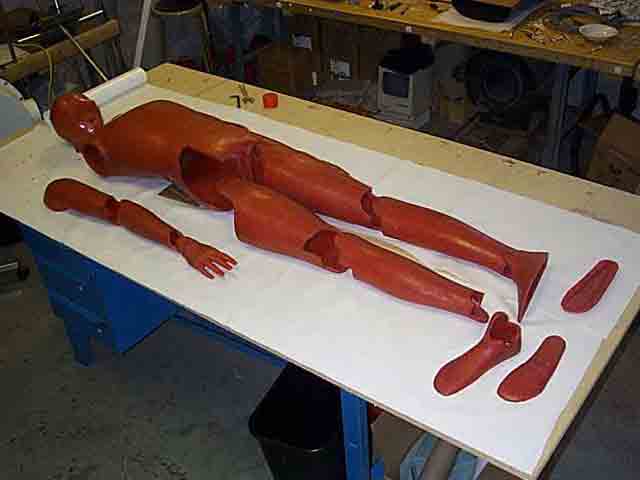
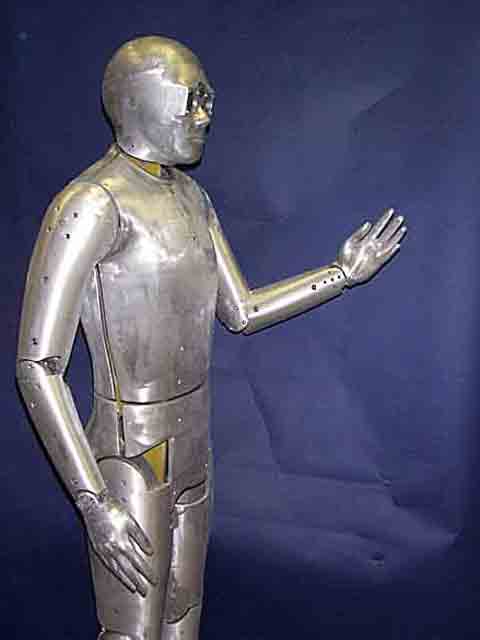
One of the products they custom manufacture are"sweating hot-plates," usually about 12 inches square in size. These devices are used in a laboratory setting to evaluate how fabrics interact with a warm and moist surface - such as a person.

The primary clients have been fabric and clothing manufactures, who with sophisticated computers attached, test their latest creations. One such client was 
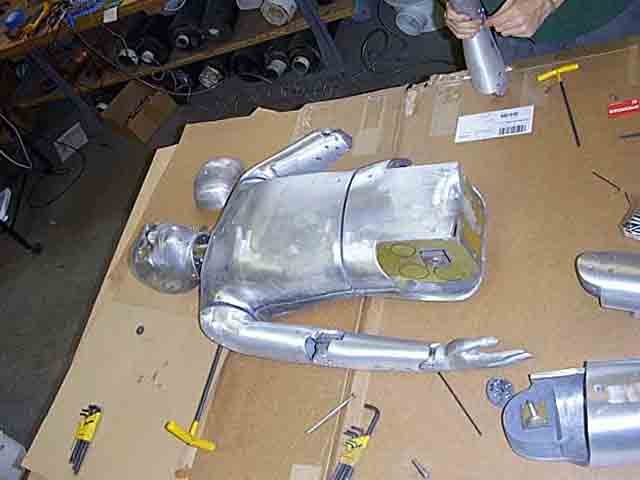
the Chinese Textile Institute. But the sweating hot plate they wanted was not the typical sweating hot plate (as if there is such a thing), No - they wanted a poseable sweating aluminum mannequin.

And I just happen to come through MTNW's door...

To see a larger image, slide-show version, click here, or on any of the images below.


Say Hello to Huey


Finished Mannequin

I'm starting with a completed shot because this project is too wierd to explain with out it. Here is Huey shortly before he was sent away. A local foundry, whose usual products are helicopter turbines fans and other precision pieces, cast Huey's aluminum parts.

The casting technique they use is known as "lost wax casting," which requires the item first be made completely, and accurately in wax, then a ceramic mold is formed around the wax piece, the wax is melted out and replaced by the molten metal.

To aid in accurate fabric evaluation, the mannequin is divided into several "heat zones." Each zone is controlled by a computer, which regulates the temperature and moisture in that zone. As aluminum is very thermally conductive, a major requirement for the mannequin is to have a uniform wall thickness.

Picture a chocolate Easter bunny with the chocolate thickness being exactly equal no matter where you bit in to it. This foundry has many years of experience, but this is not a usual request, and they had no idea how to achieve it. That was my job.

Not having any idea what couldn't be done, I plunged right ahead. MTNW had an existing two part (front half and back half) negitive mold, made from a store mannequin, available for my use. I thought of brushing or sloshing the molten wax into the mold, but that would be a slow and uneven process at best, as any imperfection in the wax would also show in the final aluminum piece.


Insperation


Lining the Mold

It finally hit me - in the existing negative mold, build up the surface to the 3/8" thickness, and make a removable fiberglass shell on top of that. Once the fiberglass has cured, pull out the lining material. When the two parts are places back together, there would be a constant-thickness hollow space between them to pour in the wax.

I carefully fitted the lining material (the white stuff in the photo) - a product known as Coremat, into the negitive mold.


Fiberglass Shell


Fiberglass Shell

After sealing the Coremat, to make sure the fiberglass resin wouldn't saturate it (so it could be removed later), I laied-up the fiberglass shell.

Not knowing how many other manniqunns might be built in the future, I tried to make the molds durable. I braced the shell with wood and resin impregnated cardboard, and used pins to align the pieces.


Wax Plumbing


Wax Plumbing

The ideal would be to cast Huey in a single large pour - fewer cooling and shrinking problems. Due to budget and shop limitations that wouldn't be possible, so, the wax Huey would be cast in four smaller pours; lower then upper front half, and lower then upper back half. After that, all the parts would be fitted together.

Here is the beginning of the pour set-up. Pre-heating the fiberglass mold and the pouring plumbing was a necessity to ensure an even flow through out the mold.


No Bubbles


Casting the Torso

Here is a shot of the torso-casting set-up. Another possible defect in casting wax is air entrapment - bubbles forming from pouring a molten wax into the mold. To help eliminate that, I would fill the mold from the bottom up, but I wouldn't open the valve at the bottom until all the air in the pipe "burped" out.


Oops


A Bad Cast

There was so much about wax I had no idea I didn't know, fortunately the casting wax supplier was very helpful. Here, in an early test, I found I needed a lot more mold release!


A Good Test


A Good Test

After a much more successful test, I discovered a neat thing, as the outer shell of the wax cooled, the inner area would shrink down. What this meant was the torso pour would "socket" into the leg pour, the end result would be a stronger wax piece. Strength of the wax is an issue simply because of all the handling needed in making the molds for the aluminum castings.


Huey's Head


Wax Head

One of the first pieces I cast for keeps was the head. It came out great. The flat area, where the eyes would be, is the place where the computer and water connections are made. The sweating is done with a small pump outside the mannequin and plumbed with little tiny tubes all over the inside of Huey.


The Man of Wax


All he needs is a wick

The pouring went very well, and rather quickly too. Here he is, all put together just before he's cut all apart.


Articulated Joints


Wax Arm Joint

Here is an example of a typical joint. In the final aluminum piece, the joint is bolted together. The layout and cutting needed to be accurate but with a lot of tolerance. By that I mean, the leg needs to swing front and back, not side-to-side, but the clearance within each joint is relatively large.


Wax parts


All the Wax Parts

All the pieces are ready to go to the foundry to become cast aluminum. Workers at the foundry would take the wax shapes, repair any surface imperfections, and create the ceramic molds around them to cast the molten aluminum.


Aluminum parts


All the Aluminum Parts

The aluminum is back from the foundry. The next step is to line the various parts with the heater wire. To achieve accurate test data, the lengths of the heater wire are critical, as is thermally isolating all the "heater zones" from one another. To mount the joint-pivot hardware, and isolate the zones, a 1/2" thick epoxy sheet stock was fitted inside the body as needed.


So long


Huey Waves Good-By

Wave by-by. Huey's on his way to the far east.


Return to Portfolio
Top of Page