Configuring a Windows NT server to connect to Seanet.
This document will walk you through the process of checking the settings for NT Workstation 4.0's Remote Access Service and Dial-Up Networking. Included in this document are the settings for both stand alone machines and those connecting their Local Area Networks (LANs) to the Internet.
Warning: Not following these instructions carefully will cost you lots of time and frustration!
In order to proceed, you will want to make sure that you are logged into the NT machine as Administrator, or a user with administrator privileges.
Network Settings (RAS and TCP/IP)
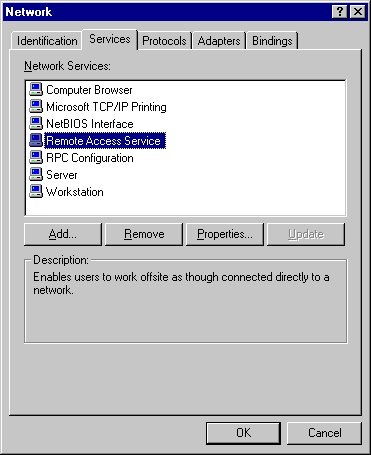
- First bring up the Network Control Panel by double clicking on My Computer, then Control Panels, and then Network.
- Select Remote Access Service (RAS) and click on Properties.
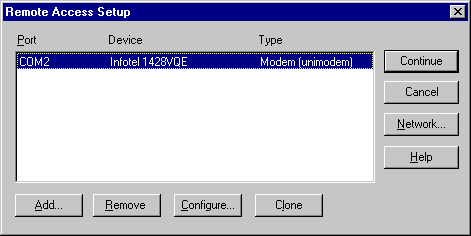
- You should now be looking at the RAS settings. Your modem or ISDN adapter should be listed. Click on Configure.
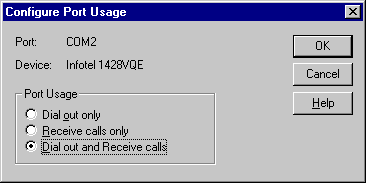
- Mark either Dial out and Receive calls or Dial out only. Click OK.
- You will now be back to the RAS window. Click on Network.
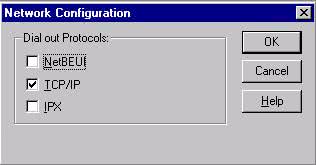
- If you selected Dial out and Receive you will see this window. Make sure TCP/IP is checked.
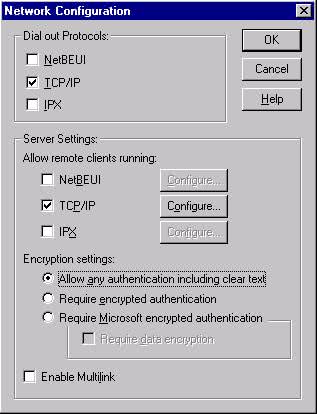
- If you selected Dial out only you will see this window. Make sure TCP/IP is checked.
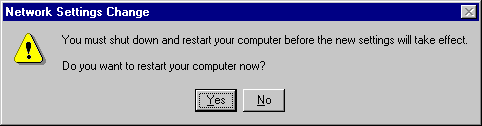
- Back at the RAS window, press Continue. Then press Close. You may be asked to restart the computer. If you are, do so. Once the computer is rebooted, continue with the instructions below.
Note If this is a stand alone computer, press Close now. You may be asked to restart the computer. If you are, you want to do so. Once the machine is rebooted, skip to the Dial Up Networking section of this document. If this is a computer that is connecting a Local Area Network (LAN) to the Internet, then you will want to continue with these instructions.
To connect a LAN to the Internet, you can use a subnet of public IP addresses. (You will need one IP for every machine +2.) If you do not already have a subnet, you can contact our sales department to purchase one.
If you are connecting your LAN to the Internet and have your subnet, you're ready to continue. You will want to have any information regarding your subnet available.
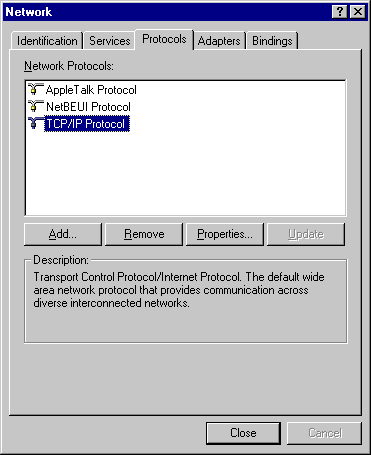
- Select TCP/IP and click on Properties. (There may be other protocols listed here.)
- IP Address: Enter an IP address from your subnet (not the very first or very last) and the appropriate Subnet Mask. Default Gateway:
199.181.164.101.

- Here you will enter information about Seanet's DNS servers. Domain Name System: Host Name and Domain will already be entered and you will not want to change them. DNS Search Order: Click Add. For the IP address, type in:
199.181.164.1 and click Add. (If you already have 3 IP addresses here, you are not able to add anymore. If you do not, click Add again.) For the IP address, type: 199.181.164.2 and click Add. Domain Suffix Order click Add. Type: seanet.com (make sure it's all lower case). Click Add.

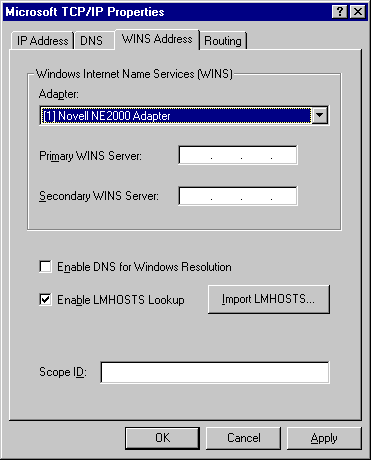
- This should be left blank, unless your network requires entries. The only option that should be marked is Enable LMHOSTS Lookup.
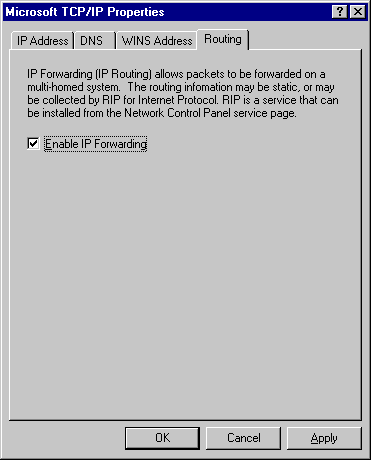
- Because you are using this machine to route your LAN to the Internet, check Enable IP Forwarding.
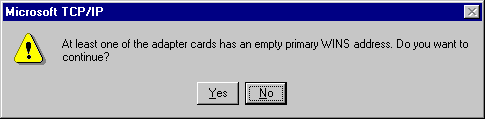
- Click OK. You may get a message dialog about the WINS addresses being left blank. Click Yes, that you want to continue.
- You will now be back to the Protocols tab in the Network Control Panel. Click Close. If you made any changes, it will ask you to restart the computer. If it does, you will want to say Yes.
Dial Up Networking Settings
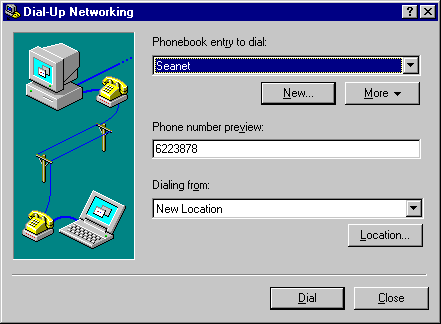
- Double click on My Computer, and then Dial-Up Networking.
- Select the Seanet phonebook entry and click on More, and Edit entry and modem properties.
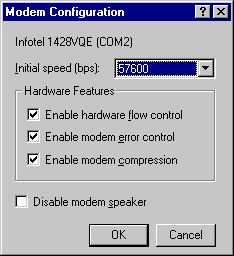
- You should see the Entry name, Phone Number, and modem that you're using. Click on Configure, next to the modem or adapter you are using.
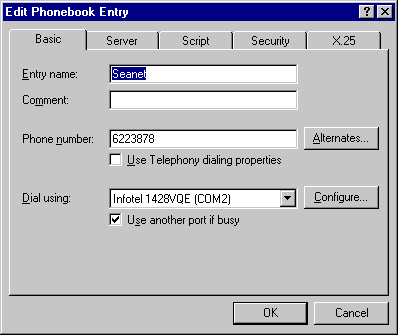
- The Initial Speed should be 38400 for a 14.4 modem, 57600 for 28.8 or 33.6 modem, and 115200 for faster modems. The Hardware Features should all be checked. If you do not want to hear the modem while it's connecting, mark Disable modem speaker. Click OK.
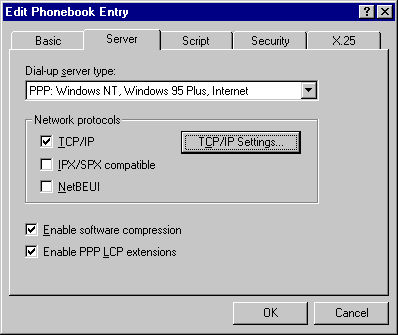
- Only the following should be selected/ checked here: The Dial-Up Server type is PPP: Windows NT, 95 Plus, Internet. Network Protocols: TCP/IP. Check: Enable software compression & Enable PPP LCP extensions.
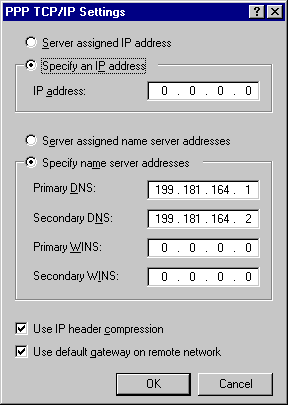
- Only the following should be marked: Specify an IP address (if you have one, otherwise, mark Server Assigned IP Address), Specify name server addresses:
Primary DNS:
199.181.164.1,
Secondary DNS: 199.181.164.2,
Primary WINS: 0.0.0.0,
Secondary WINS: 0.0.0.0,
Use IP header compression,
Use default gateway on remote network.
Click OK.
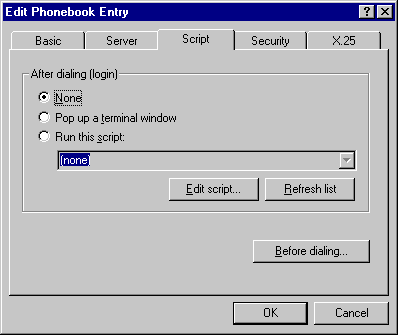
- This should be marked as None.
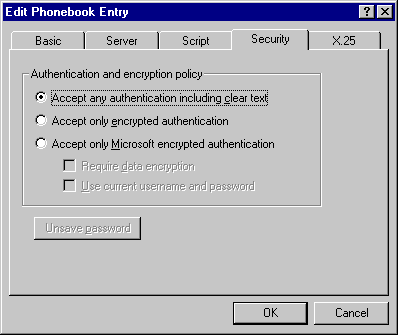
- The Authentication and encryption policy is Accept any authentication including clear text.
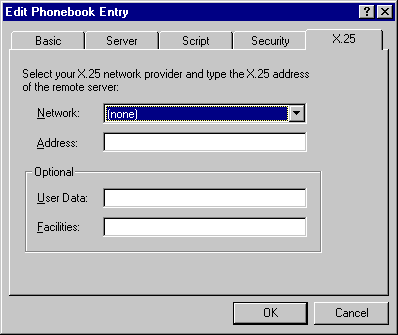
- Network should be (none) and the rest should be blank. Click OK.
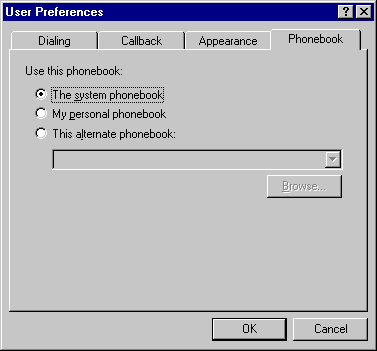
- Back at the connection screen, click on More, then User preferences. There is not much change needed for the following tabs, but the settings should be checked anyway.

- You shouldn't have to make any changes here unless you want to. These settings are personal preference.

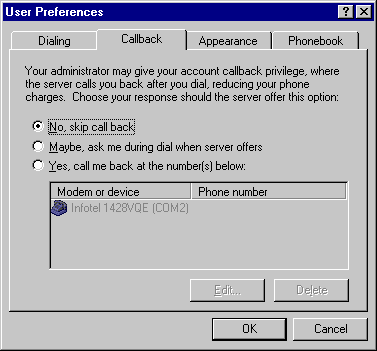
- Mark No, Skip call back.
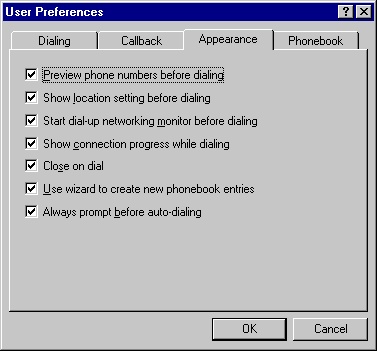
- You do not need to make any changes here. Again, this is personal preference.
- Here, also, you do not need to change anything. Click OK.
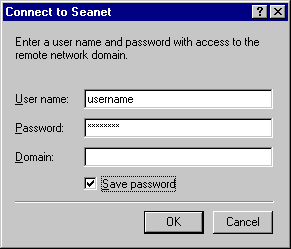
- Click Dial to connect. When you click Dial, it will ask you for a User name, Password, and Domain. The User name is your Seanet login name. Make sure you enter it all lower case and you leave off any thing extra like "@seanet.com". You want it to just be your login name. The Password is your Seanet assigned password. Remember that it is case-sensitive, so you will need to be careful while typing it in. Leave the Domain field blank. If you enter anything here, you will receive an invalid login. Save Password if you do not want to enter your password every time you log in to Seanet. Click OK. You should connect successfully!
Troubleshooting
Login problems
- Make sure that you are only entering your Seanet login name for the username and not your password or your real name. Also, make sure that you have nothing in the Domain field.
- You may receive an invalid login at some point after you have saved your username and password. To fix this, you'll want to go to the main Dial Up Networking screen click on More, then Edit Entry and Modem Properties. Click on the Security tab and click Unsave Password. Click Ok.
Modem Problems
- Try power cycling the modem. If it is external, simply turn it off and back on after a couple seconds, or unplug it and plug it back in. If the modem is internal, restart the computer.
- If power cycling the modem doesn't do the trick, find out the brand name of the modem you're using, either from your manual or by going to Control Panel and Modems. Our technical support staff has a long list of modem initialization strings that may improve your connection. Give them a call and let them know the problem you're having and the brand name of the modem. They can help.
- If you already have an initialization string and just need to know where it goes, go into My Computer, then Control Panel, and then Modems. Click on the Properties, the Connection tab, and then click on the Advanced button. In the Extra Settings field, type the initialization string. Click OK, then OK again, then Close. You will now want to restart the computer, or reset the modem if it's external.