
Bonnie's room with complex geometry (toys and furniture), complex shading, many textures, 15 light sources, subsurface scattering, and 4 bounces of global illumination. This image renders nearly 10 times faster with RenderMan XPU than with our previous-generation RenderMan (RIS). (Copyright Disney/Pixar.)
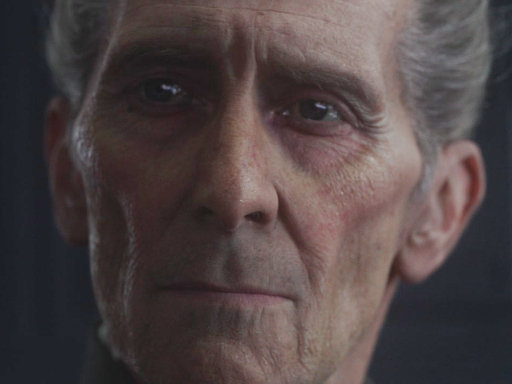
Our ray-traced three-lobe diffusion subsurface scattering was used to recreate the appearence of Peter Cushing as Grand Moff Tarkin in "Rogue One: A Star Wars Story". Those guys at ILM outdid themselves again! (Copyright 2016 Lucasfilm Ltd. All rights reserved. Image courtesy of ILM.)
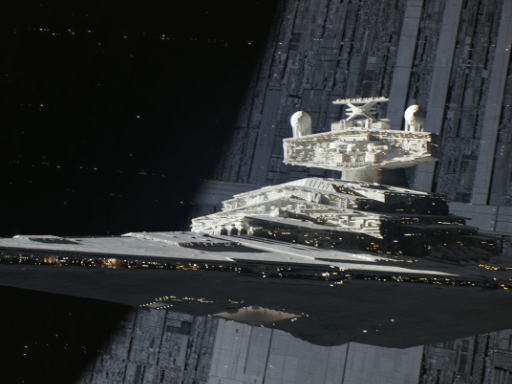
ILM used RenderMan to render every pixel in this shot of a destroyer and the Death Star in "Rogue One: A Star Wars Story". (Copyright & Trademark 2016 Lucasfilm Ltd. All rights reserved. Image courtesy of ILM.)
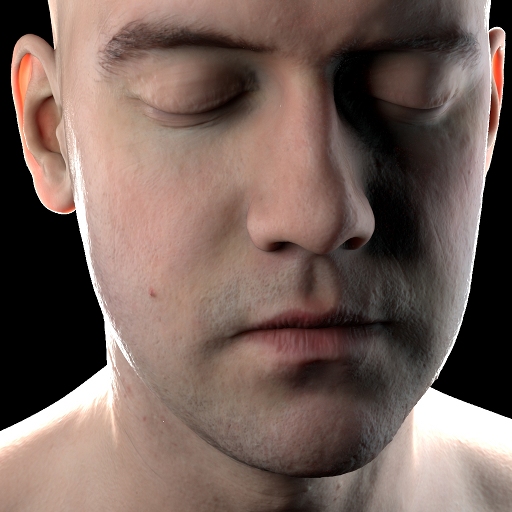
Skin with realistic subsurface scattering computed using the photon beam diffusion model developed in collaboration with Ralf Habel and Wojciech Jarosz. Rendered by Chris Harvey with Pixar's RenderMan 18. Head geometry and texture data by Infinite Realities via Creative Commons.
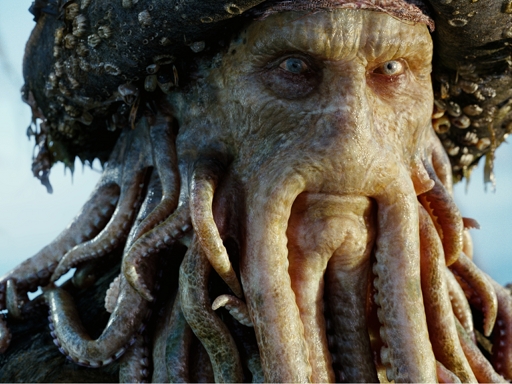
RenderMan's point-based color bleeding method was used to increase the realism of this image of Davy Jones from "Pirates of the Caribbean: Dead Man's Chest". Those guys at ILM sure know how to make a squid-faced villain look good! (Copyright 2006 Disney and Jerry Bruckheimer; image courtesy of ILM.)
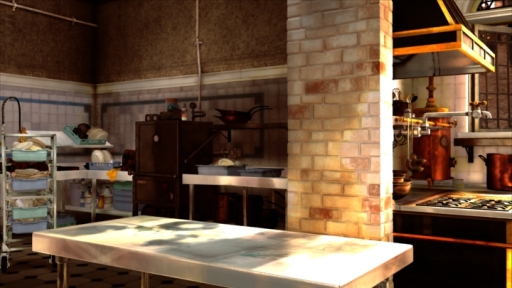
The geometry and shaders in this scene are from the Pixar movie "Ratatouille". The surface and light source shaders are very complex (actual production shaders). The direct illumination consists of around 200 light sources. The global illumination is computed using final gathering and a radiosity atlas with 4.8 million photons (radiosity points). The image was rendered with Pixar's RenderMan.
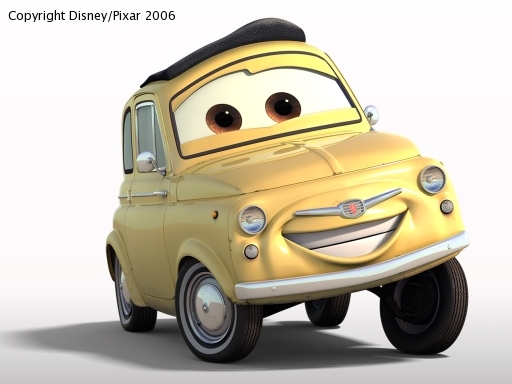
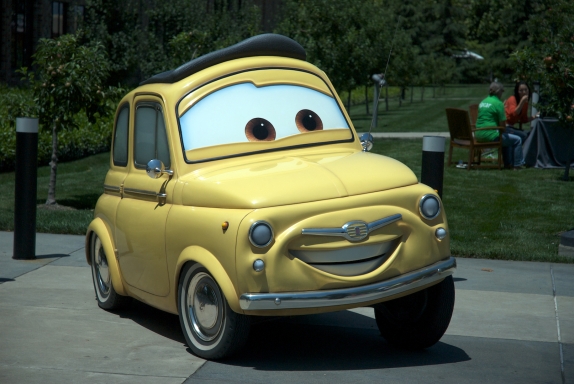
Ray tracing was used extensively for reflections, shadows, and ambient occlusion in the Pixar movie "Cars". These images show Luigi, a Fiat 500 'Topolino'. Notice the reflections -- in particular the reflection of the eyes in the hood, and the reflection of the ground in the chrome bumper and hubcaps. The image on the left was rendered using ray tracing for the reflections; it was rendered by one of the talented TDs at Pixar using Pixar's RenderMan. The photo on the right shows a real car that was made after the movie was completed. (Photo by Craig Good.)
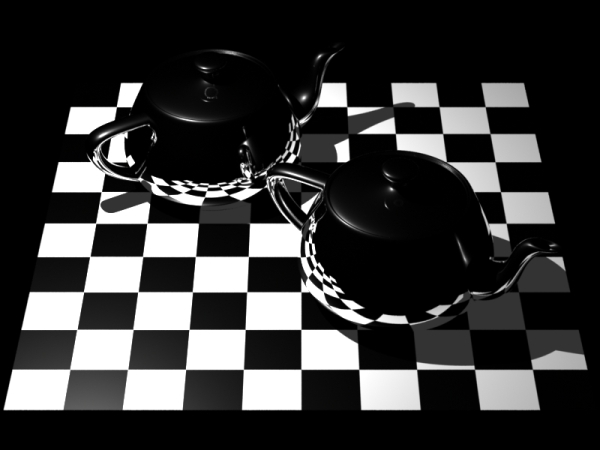
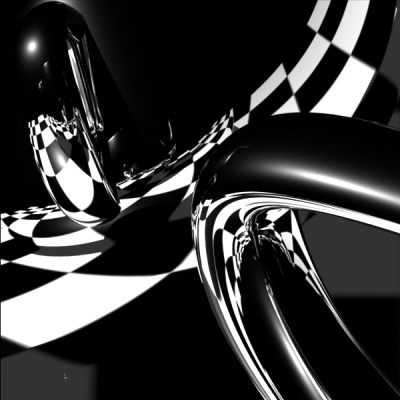
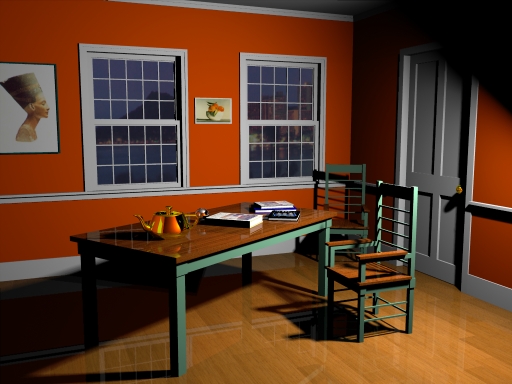
What -- more teapots? Yes! These images show an example of ray tracing for reflections and shadows. Even though the geometry is very simple, the reflections in the curved surfaces are quite intricate. Ray tracing is really good at computing effects like these. The image to the right is a close-up of the center of the left image. The images were rendered using Pixar's RenderMan.

The geometry in this scene is from the Pixar movie "Monsters, Inc." The geometry is very complex: during rendering, the surfaces are tessellated into half a billion triangles. All surfaces are shaded with ambient occlusion. The image was rendered with Pixar's RenderMan.
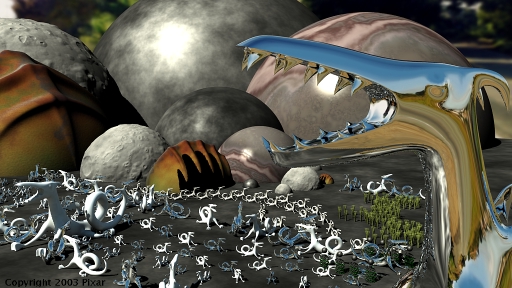
This scene contains 94 dragons modeled as subdivision surfaces. (The dragons are modeled individually, not instanced.) The geometry in the background are NURBS spheres, some of which are displacement mapped using procedural shaders. The surfaces show ray traced shadows and reflections and single-bounce global illumination. This scene was created by Dylan Sisson and the image was rendered with Pixar's RenderMan.
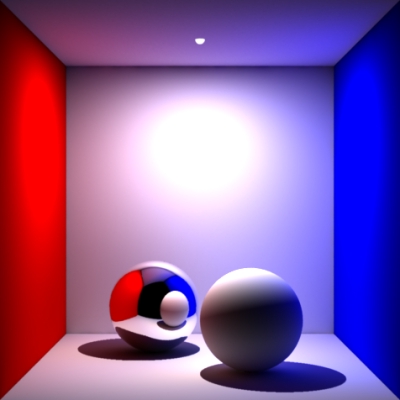
This is a "photosurrealistic" version of the well-known Cornell box. The shadow is larger than physically realistic, the reflection in the chrome ball has been tweaked to enlarge the reflection of the diffuse ball, and the color bleeding from the blue wall has been boosted. This image illustrates that global illumination can be manipulated in non-physical ways. The image was rendered with Pixar's RenderMan.
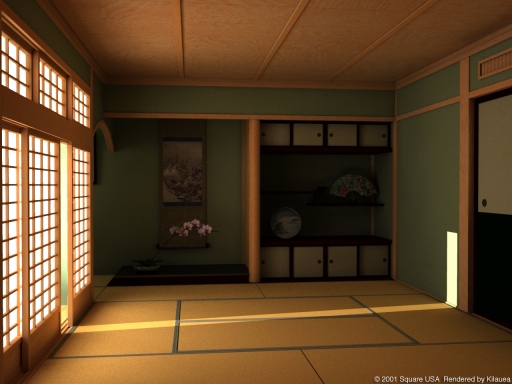
This image was computed with global illumination using a massively parallel version of the photon map method. The scene was created by Jack Liao and rendered with the Kilauea renderer at Square USA.

This is another Kilauea image. The 'Topolino' is My's favorite car (and just the right size for her)! The scene was created and rendered by Tamotsu Maruyama at Square USA. The car model is from the De Espona 3D Encyclopedia.
These are improved versions of the images in the article "Faster Photon Map Global Illumination" in the Journal of Graphics Tools. The rendering times have been significantly reduced. This scene contains more than 1 million polygons and is illuminated by an area light source. This scene was originally designed by Matt Hyatt at Cornell's Program of Computer Graphics and later extended by Eric Stollnitz and myself. The images were rendered using my little hobby renderer RaRay at resolution 1024x678 with up to 16 samples per pixel (downsampled here to half size to save storage space and bandwidth). The images were rendered on a Linux PC with a 733MHz Pentium III processor and 540MB memory. (The images were originally rendered on a tiny Sony Vaio laptop with a 233MHz Pentium processor and 32MB memory.)
This is a "classic" ray tracing image with direct illumination and specular reflection of indirect light. The shadow regions are completely black since there is no diffuse reflection of indirect light (and no fake "ambient" light). The rendering time was 3.5 minutes.
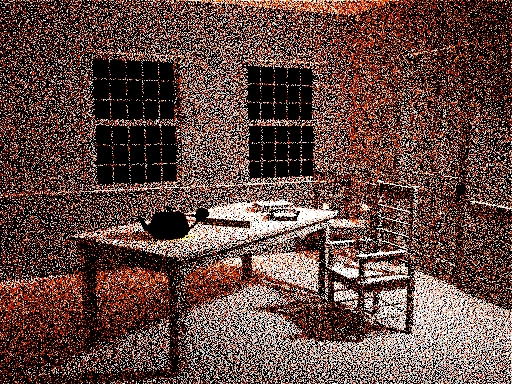
This is the photon map, the first step in computing a complete global illumination solution. This photon map contains 500,000 photons. Tracing these photons took 8 seconds, and sorting them into a balanced kd-tree took 4 seconds.
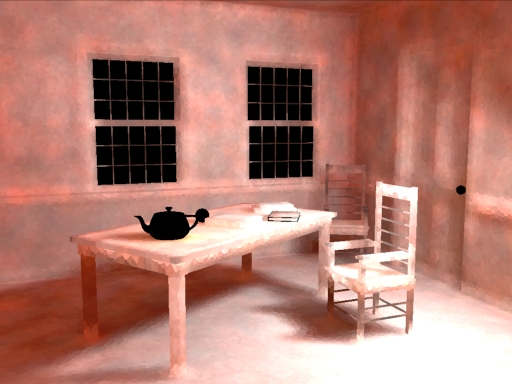
This image shows precomputed irradiance estimates at 125,000 photon positions (each computed from the nearest 200 photons). The photon positions divide the scene into a Voronoi diagram with constant irradiance within each Voronoi cell. Precomping these irradiances took 21 seconds.
In this image, the surface color (radiance) at each surface point is the precomputed irradiance multiplied by the local diffuse reflection coefficient. This is how the final gathering "sees" the scene.
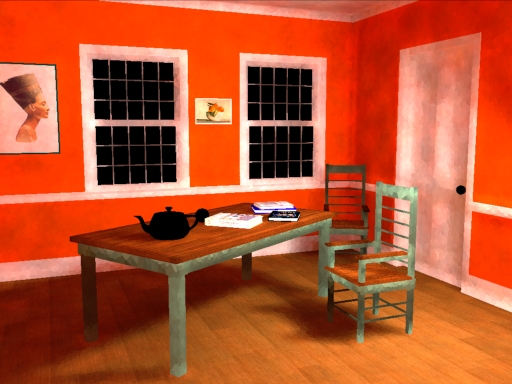
This is the complete image with direct illumination and specular and diffuse reflection of indirect light. Precomputing the irradiances reduces final gather time from 22 minutes to less than 3 minutes, and total render time from 25 minutes to 6 minutes.
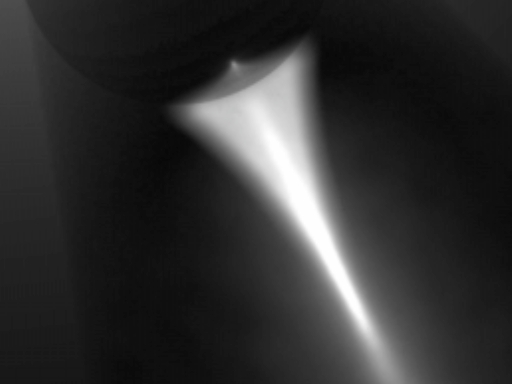
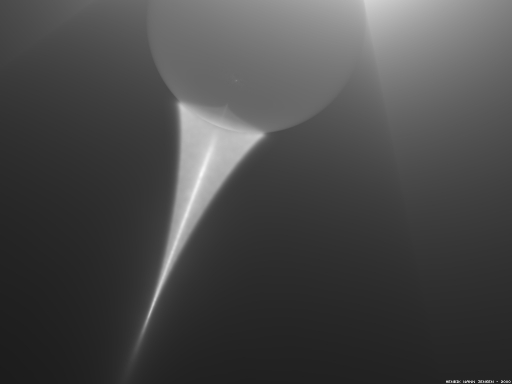
This is a volume caustic: the glass sphere focuses light into a narrow beam, and the beam is visible due to light scattering in the participating medium (smoke). Notice the intriguing shape of the outer edge of the caustic and the very bright narrow beam in the center of the caustic. I believe this image was the first to clearly show these characteristic features of the 3D shape of a caustic from a glass sphere. The light transport was simulated by tracing photons and storing them in a volume photon map, and then rendered using ray marching. I rendered this image using Mental Ray. The second image is an improved version (more photons, less blur) rendered later by Henrik Wann Jensen using his Dali renderer.
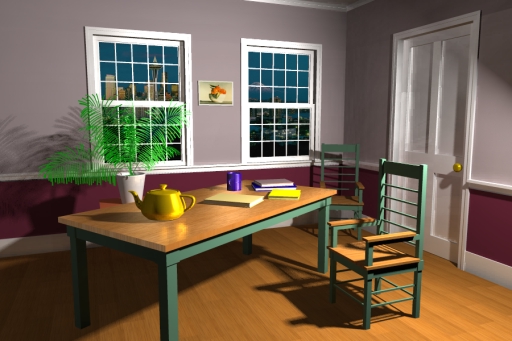
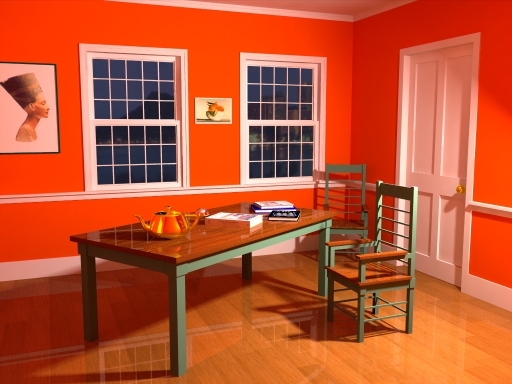
This (older) version of the interior scene was rendered as part of my Ph.D. work using a finite-element glossy global illumination method with wavelets, clustering, and importance. This version of the scene consisted of 7,700 surface patches.
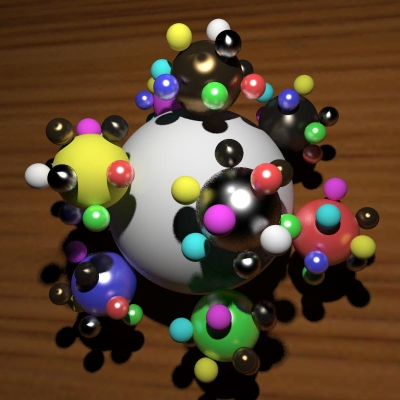
This scene was also rendered as part of my Ph.D. work. It is a "sphereflake" with many different colors and reflection types (isotropic and anisotropic glossy reflection and diffuse reflection). This sphereflake consists of approximately 700 Bezier patches.

This scene was rendered to illustrate the benefits of using importance in a scene where only a fraction of the scene is visible.
Back to Per's home page.