Basic Settings
Access Numbers & Connection Configuration
![]()
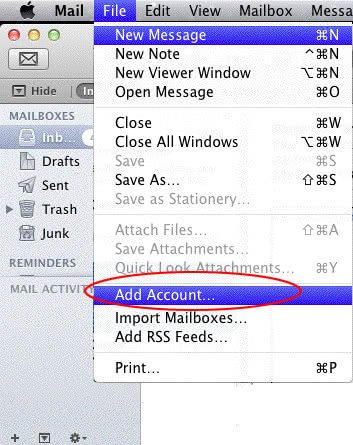
This brief walk-through will show you how to setup/configure your Seanet account in Mac Mail 5.
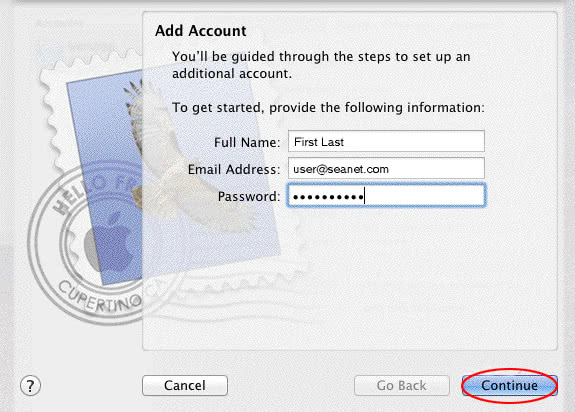
Enter your information:
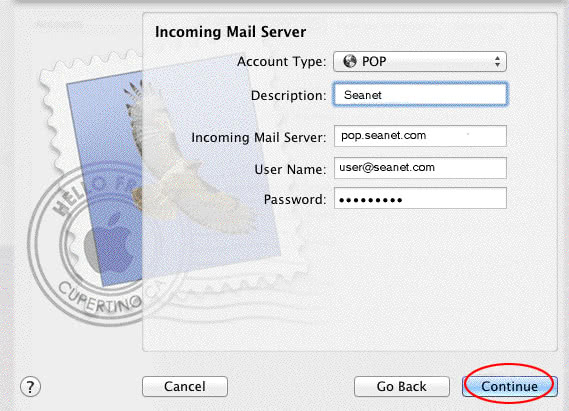
| Account type | POP |
|---|---|
| Description | Seanet |
| Incoming mail server | pop.seanet.com |
| User Name | Your Seanet email address |
| Password | The password associated with your Seanet address |
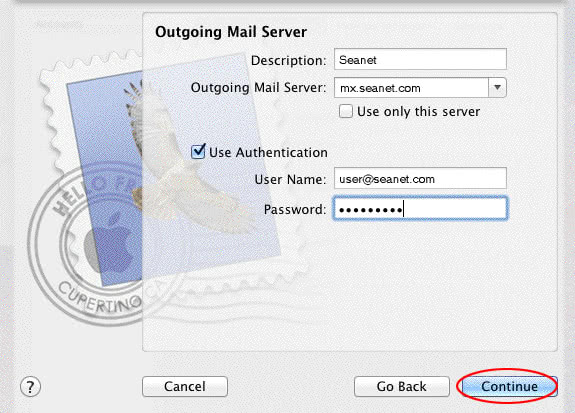
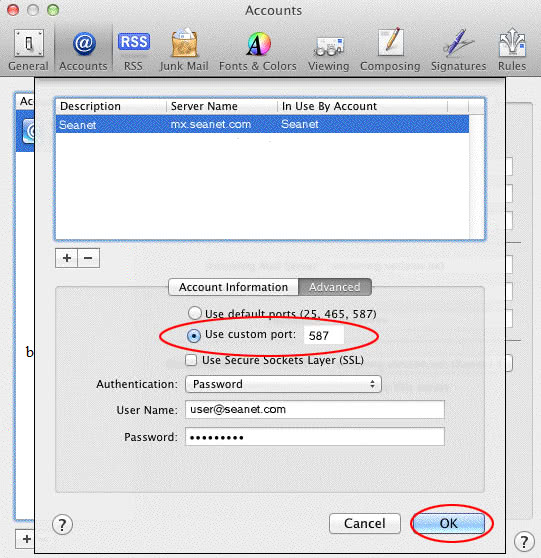
mx.seanet.com. Check the “Use Authentication” box. Username is your Seanet email address. Password is the password associated with that address. Click the “Continue” button.
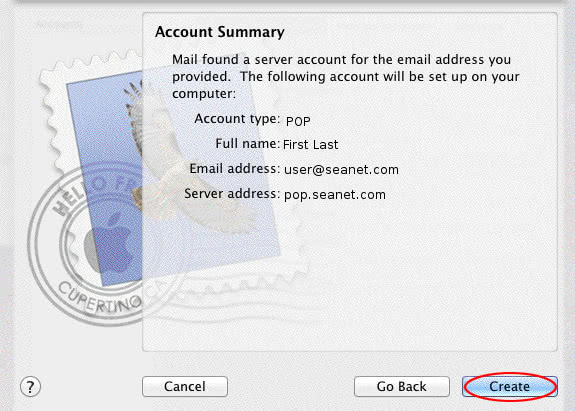
Success! You should now be able to send and receive mail using Mac Mail 5.
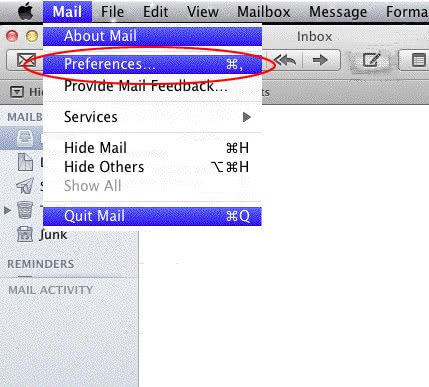
If you need to configure your existing account or if your newly created account isn’t working. Follow the next few steps to verify you have all of the information entered correctly.
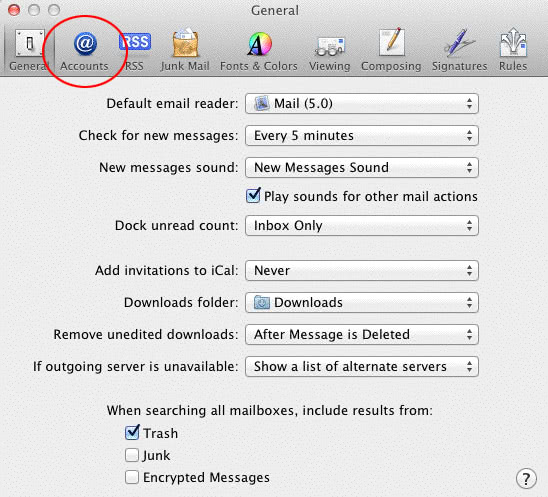
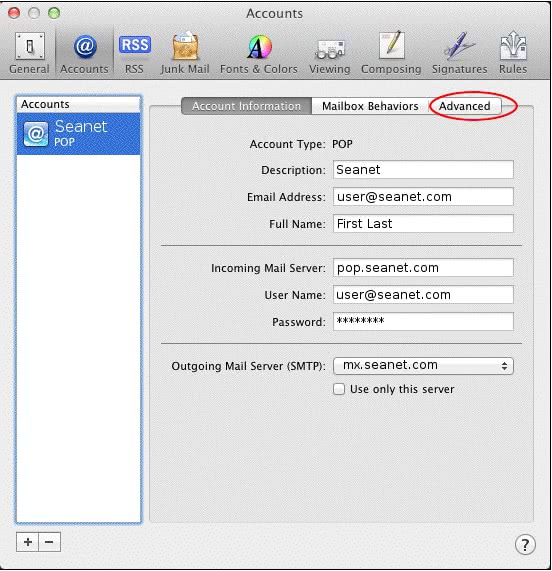
Select your account in the box on the left then verify your information is correct.
| Description | Seanet |
|---|---|
| Email Address | Your Seanet Email Address |
| Full Name | The name you want people to see when you email them |
| Incoming Mail Server | pop.seanet.com |
| Username | Your Seanet Email Address |
| Password | The password associated with your Seanet address |
| Outgoing Mail Server/th> | mx.seanet.com |
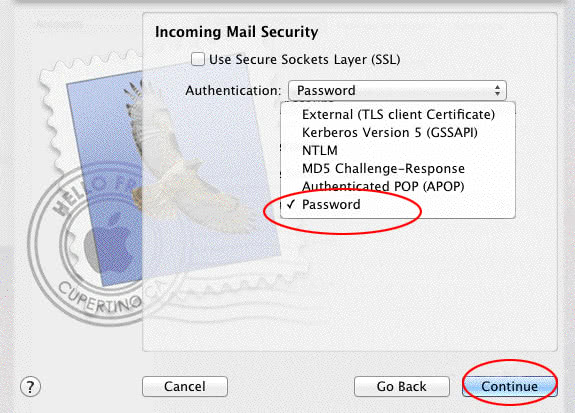
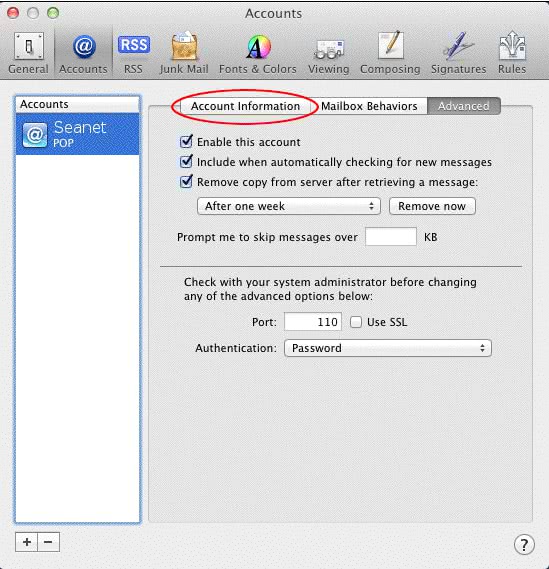
Verify that the port is set to 110 and authentication is set to password.
Note: If you intend on using this email account on more than one device or computer, check the box “Remove copy from server after retrieving a message” and select “after one week” in the dropdown.
Next click on the “Account Information” tab.
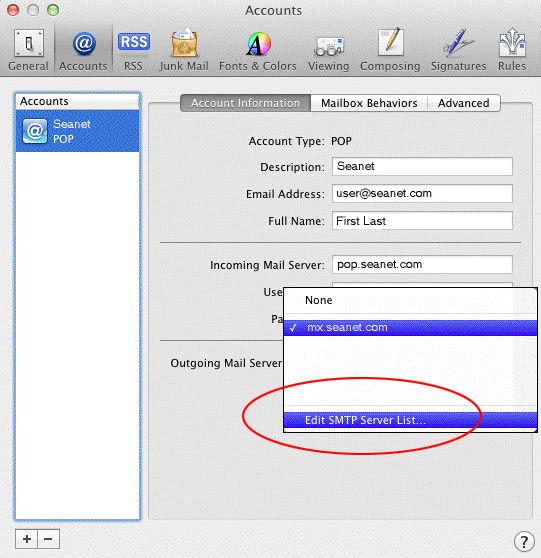
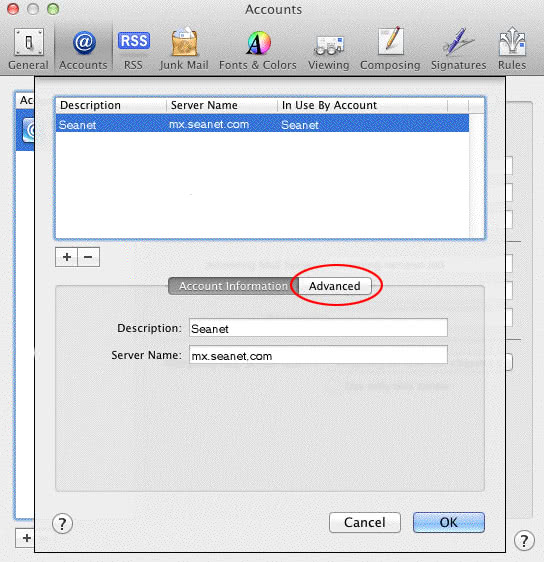
mx.seanet.com then click on the “Advanced” button.

You should now be able to send and receive email using your Seanet account with Mac Mail 5.